The common question we get is, do we have jamb liners for a specific brand of window? Yes, but not that brand. What I mean is, most brands double-hung windows used a standard profile that is universal across the industry. Yes, while there may be subtle differences in minor details, the shapes are basically the same. Here are the only three pieces of information you need to gather:
1. COLOR. White or beige.
2. LENGTH. Measure from the top of the jamb liners to the long point of the angle at the bottom. The standard lengths run every 4 inches to the 3/8″ of an inch. This should be, or close to, the length you have. We can cut standard length jamb liners up to 1″ without affecting the operation. However, you should not get a length over 3/8″ or more than 3″ away from the next standard size.
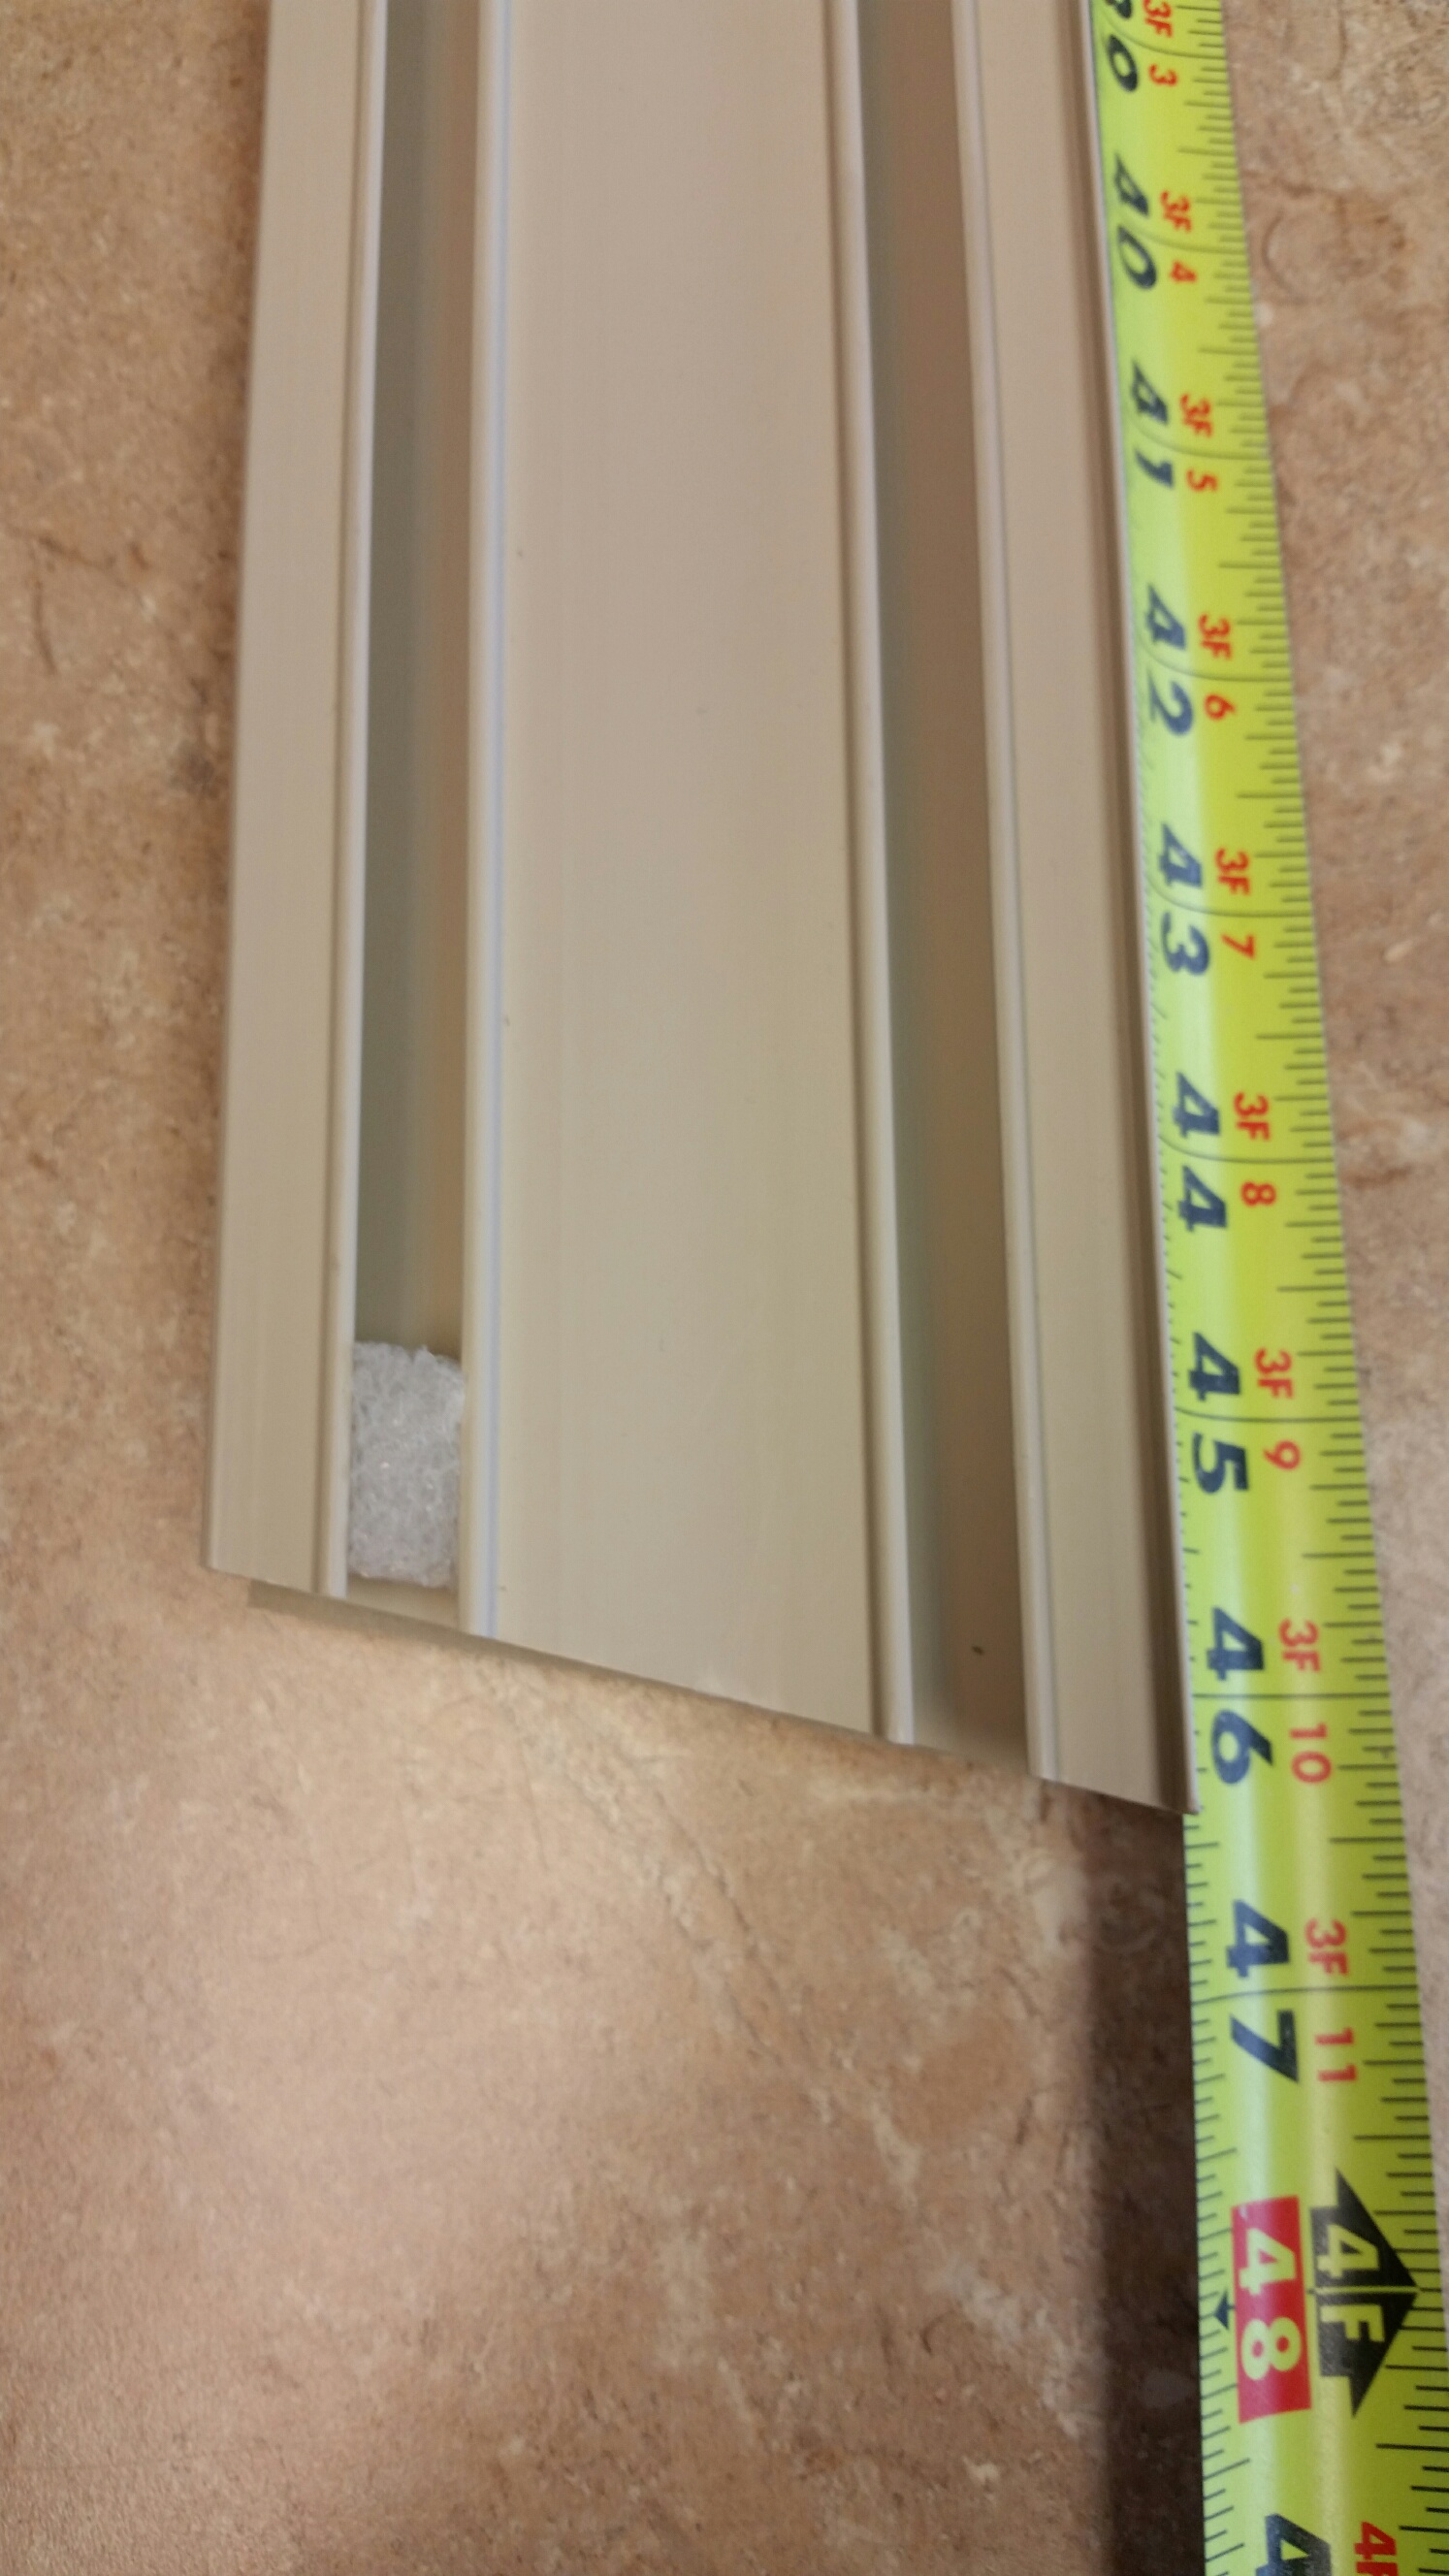
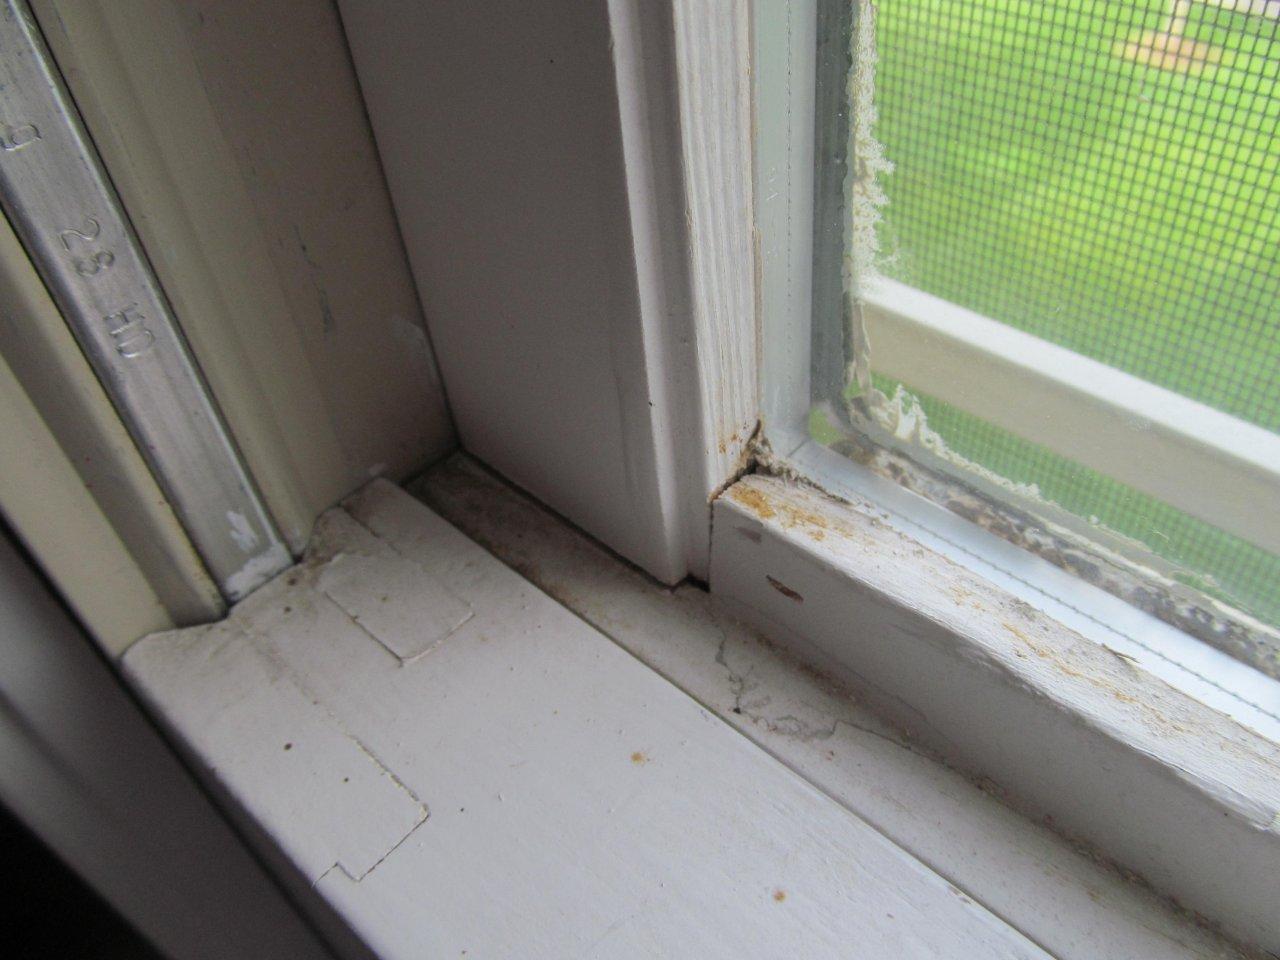
3. PLOW SHAPE. This is the shape of the track on the jamb liners that match up to the groove cut into the side of the sash.
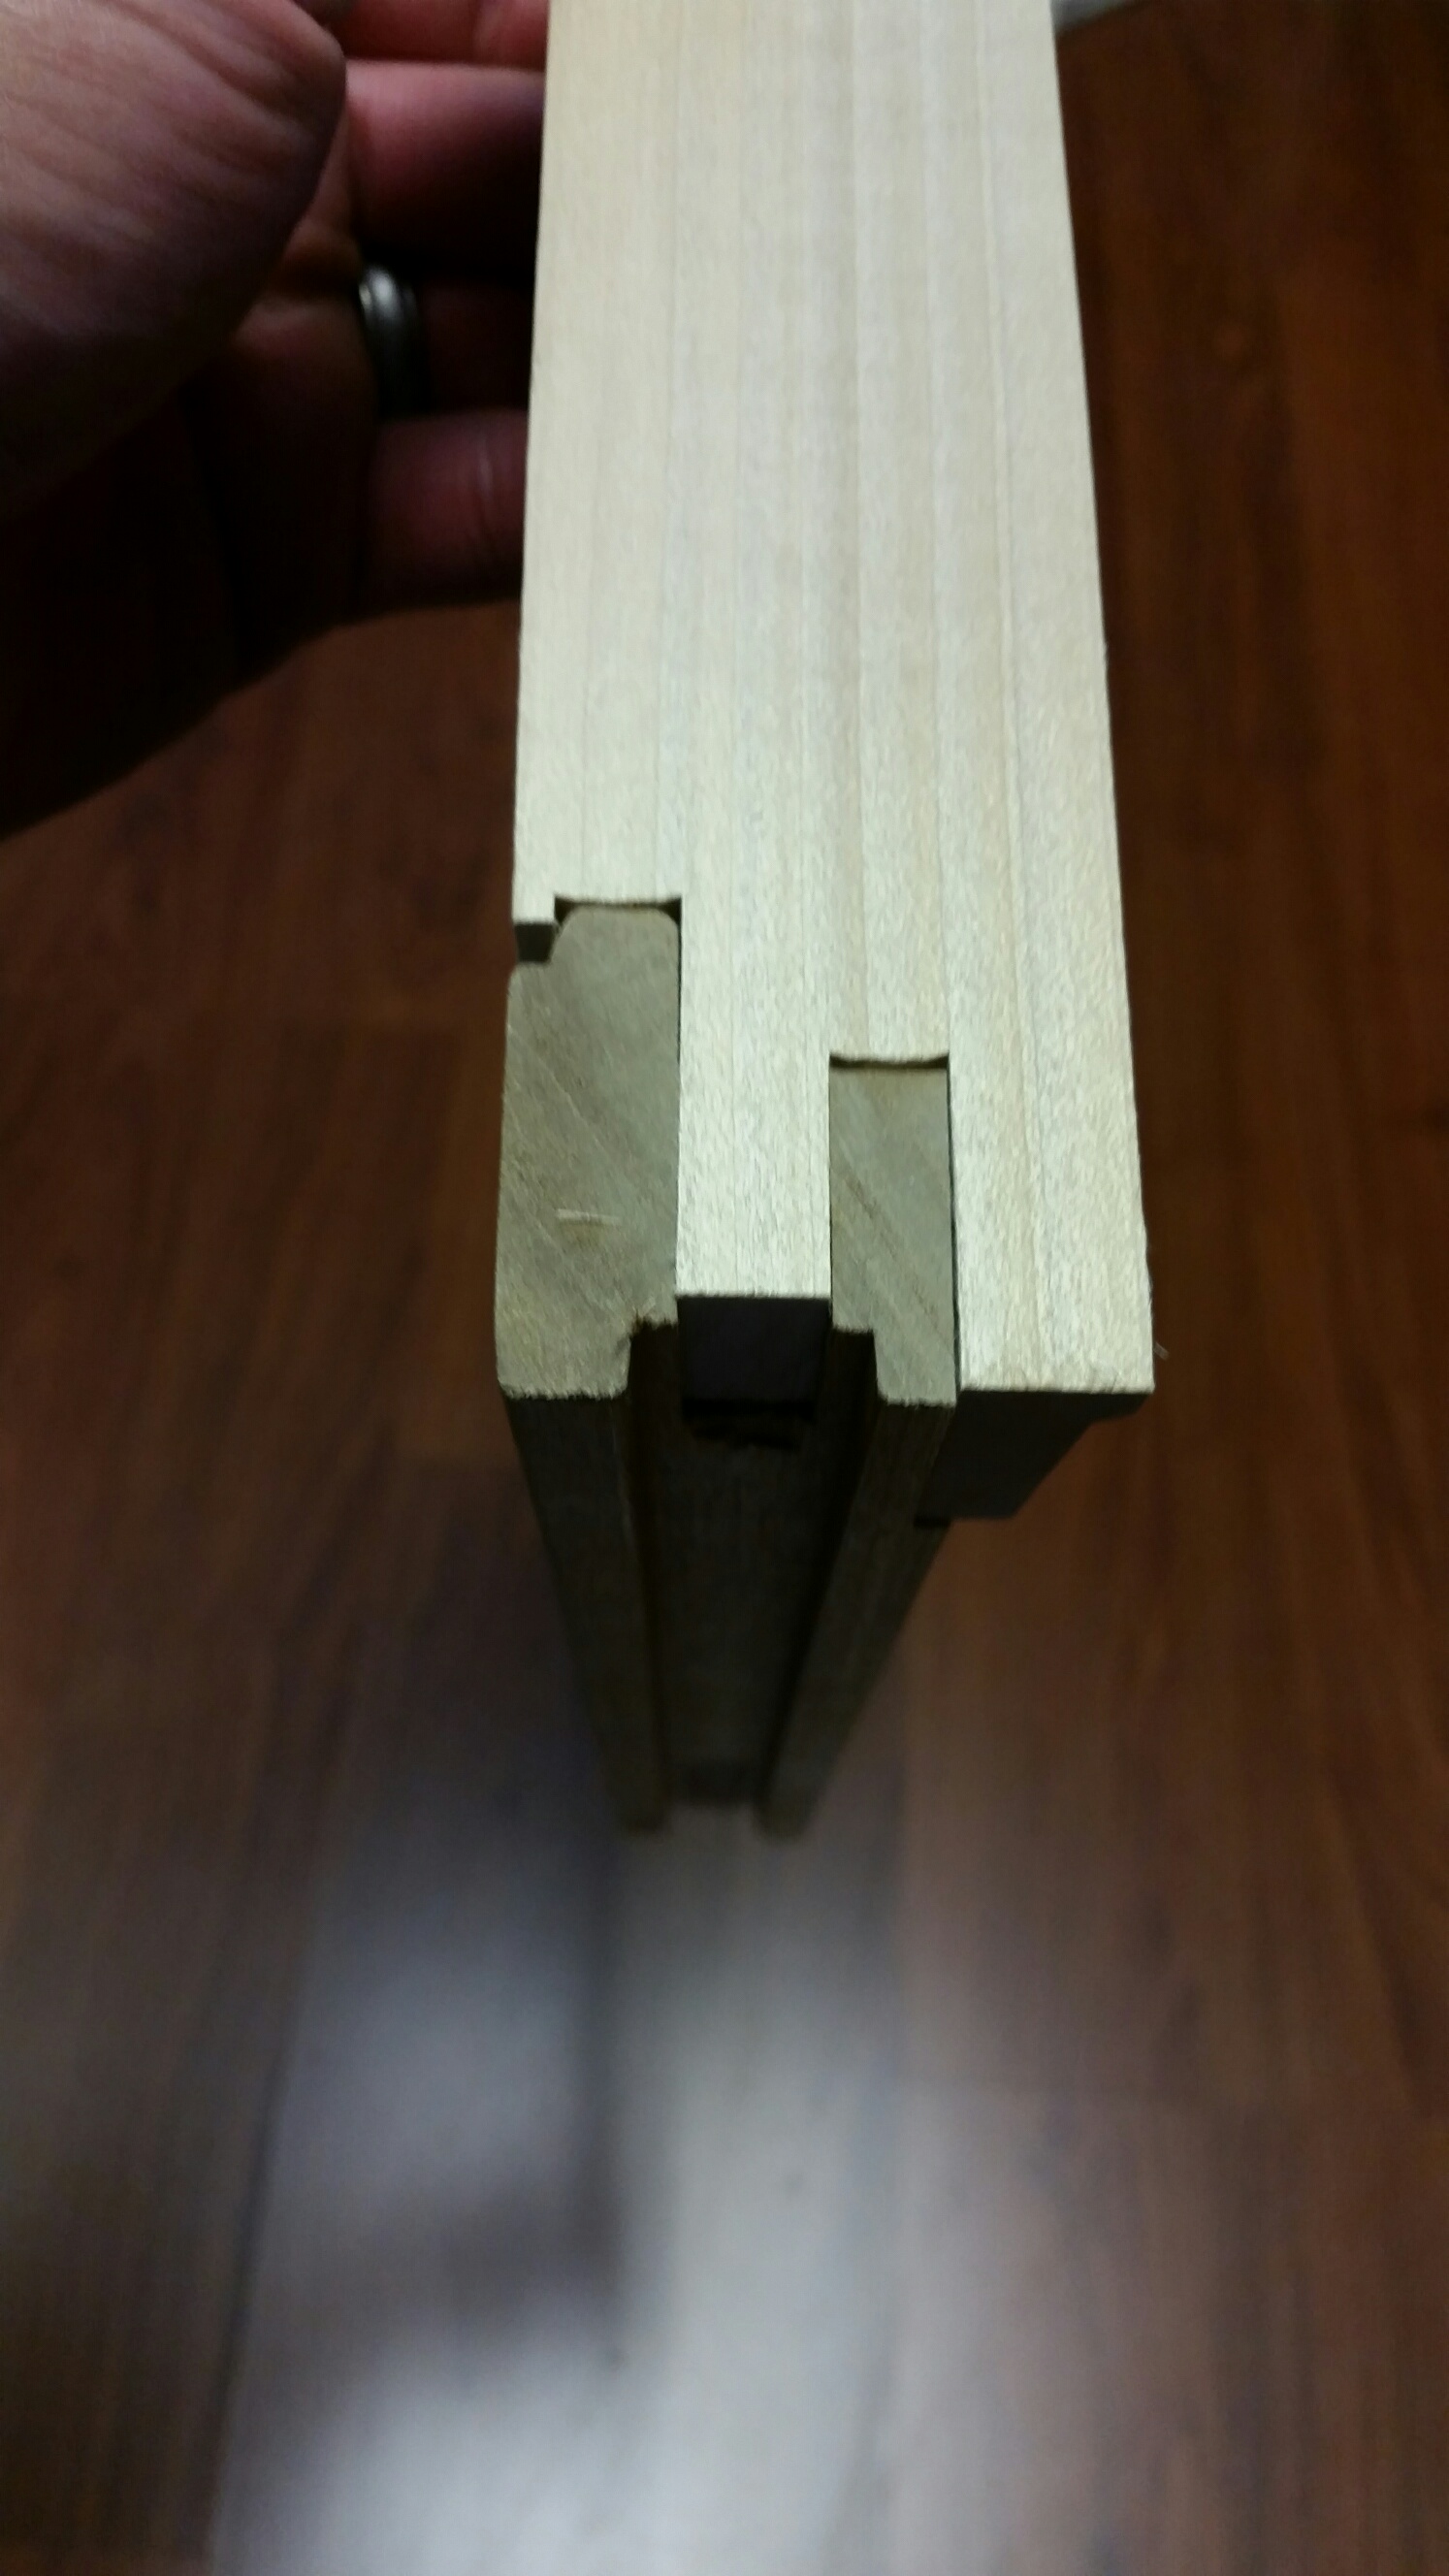
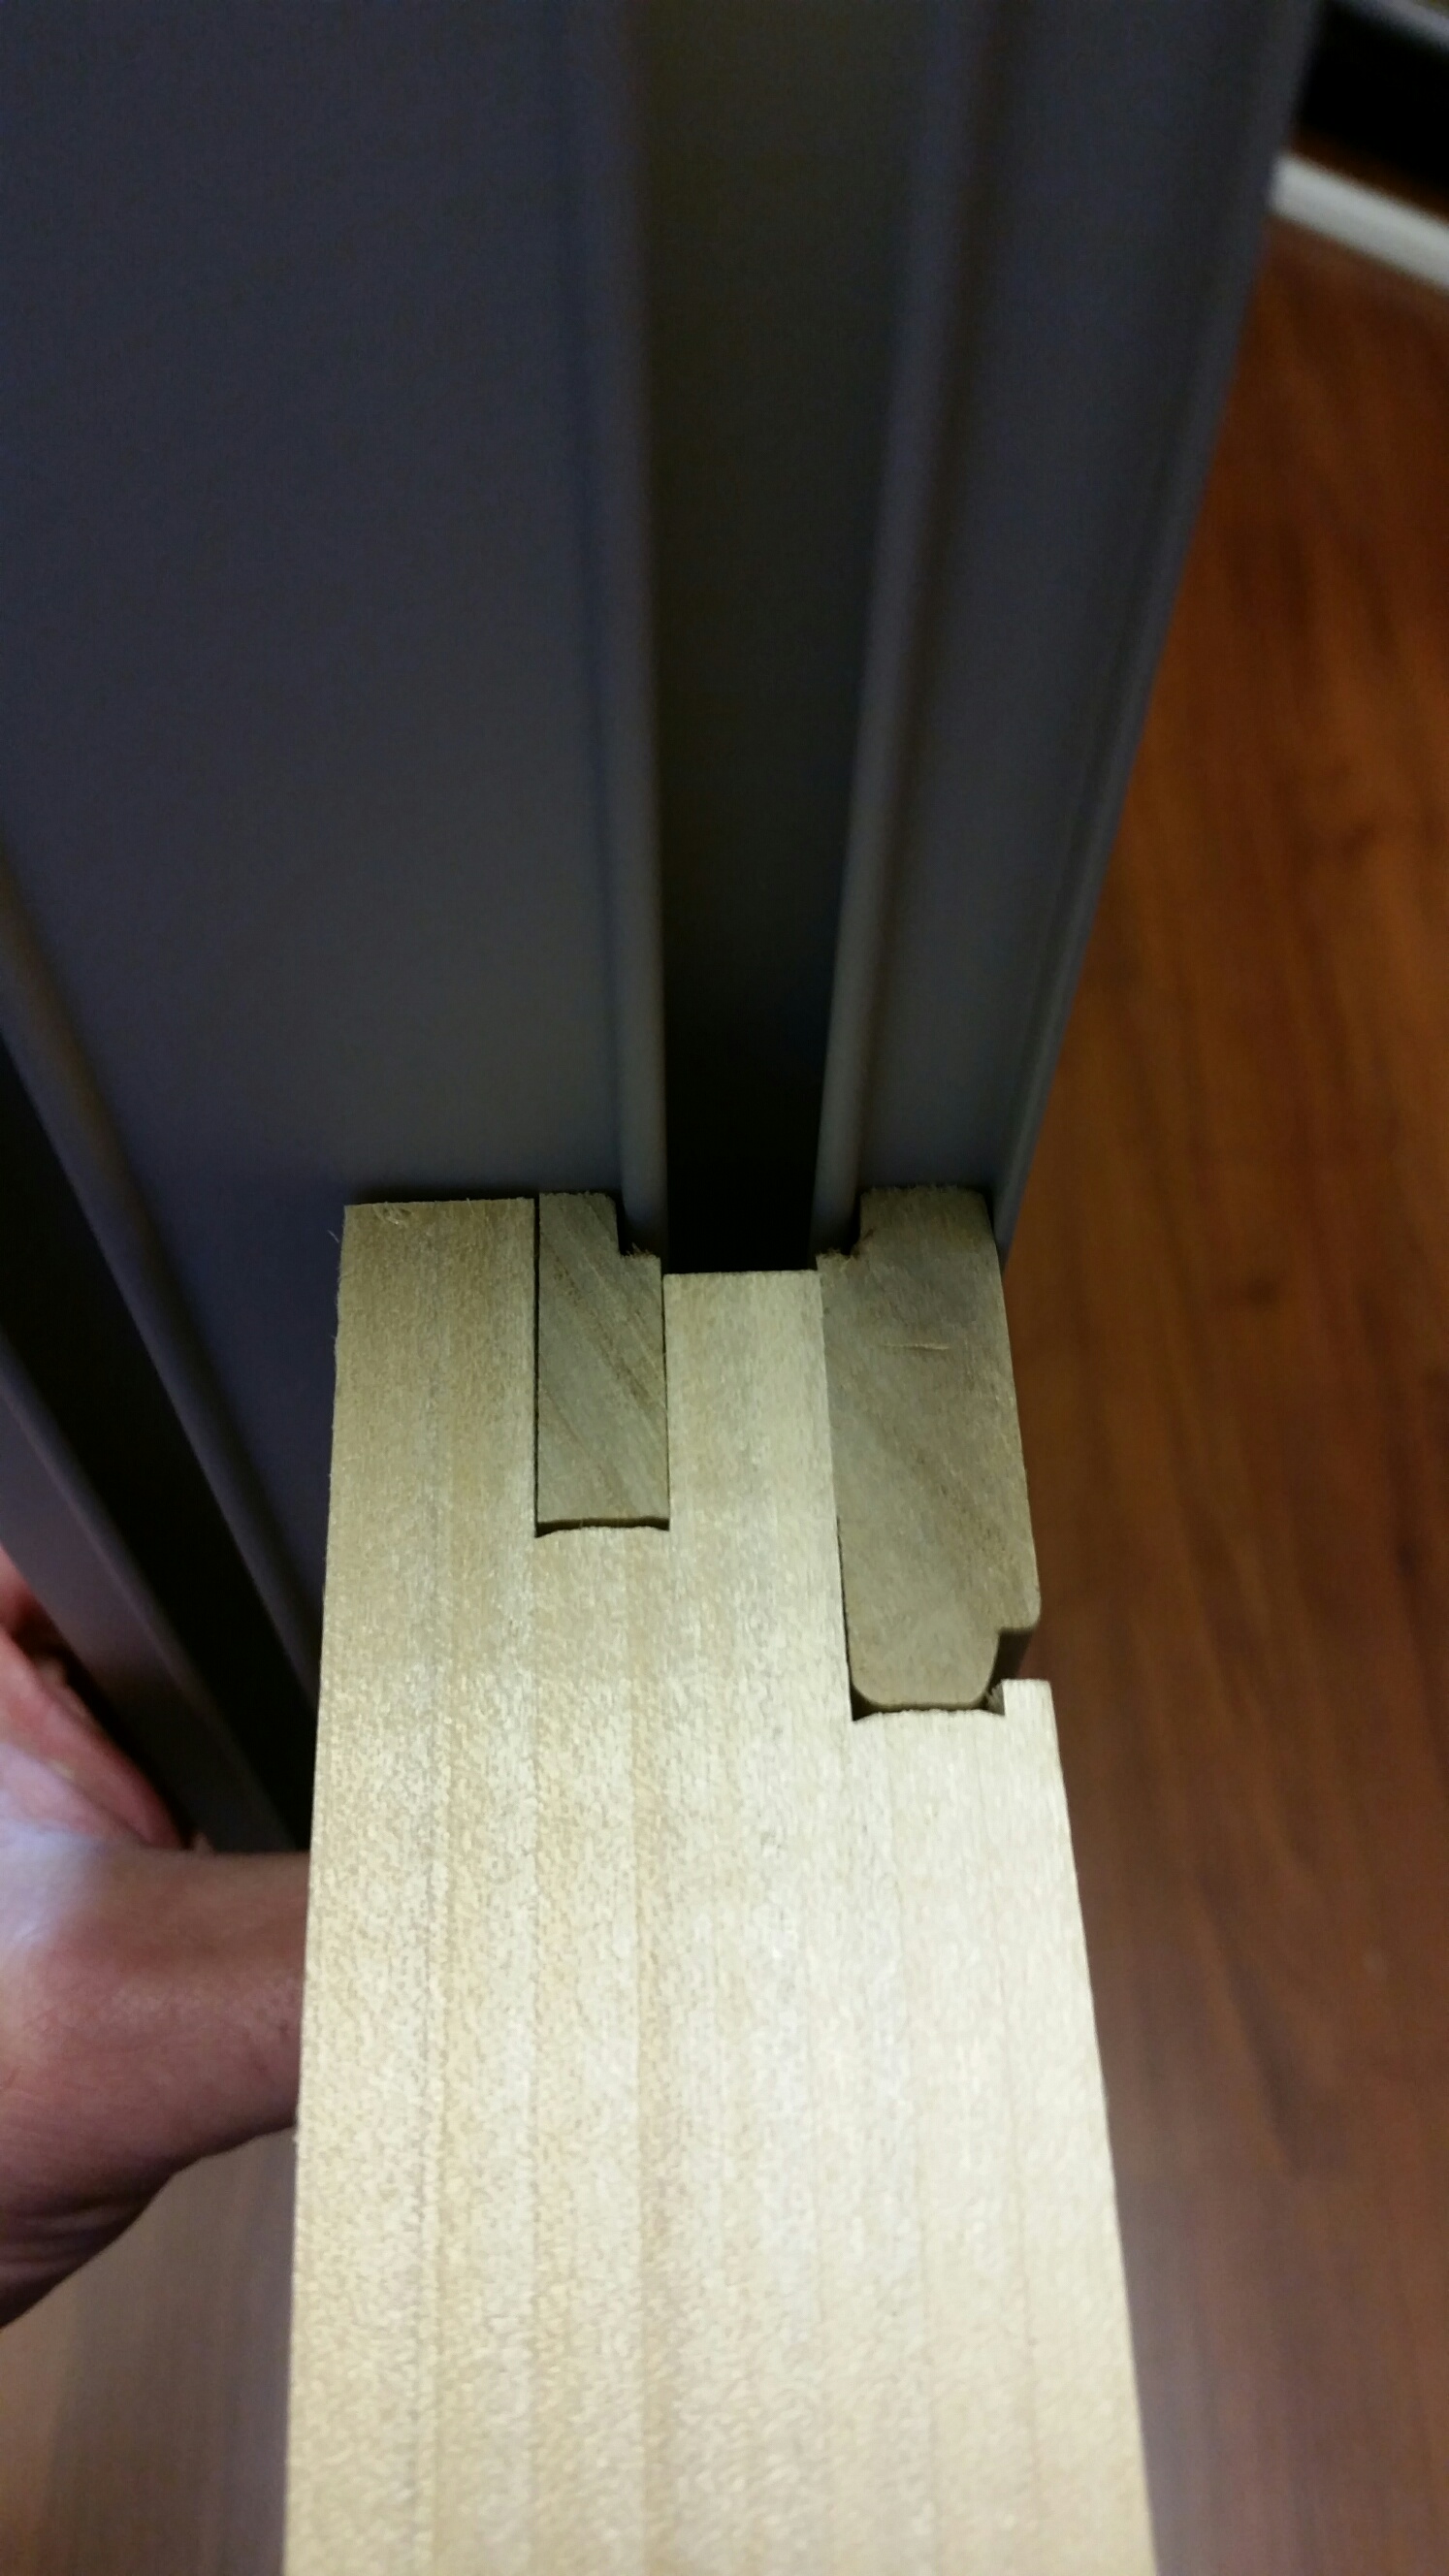 The square plow has a “square” shape to the track and a square shape groove cut into the side of the sash as you see here.
 The “V” plow has a “V” shaped track and the opposite “V” shaped groove on the sash allowing the two shapes to fit together.
We’re working on some short videos to make as many of our products DIY-friendly as possible. In the meantime, here are a few installation tips.
1. Vinyl compression jamb liners are held in the jamb pocket via a flange on the edges. These flanges fit into a groove in a piece of trim called the jamb stop. There is a jamb stop on the exterior side of the jamb, and one on the interior side. As long as you are working with a wood, tilt-in double-hung window made since the early ’80s, you should have the flange-type jamb liners. There should not be any fasteners to remove. Pry against the jamb liner in between the edge of the liner and the jamb stop to expose the flange. Continue to pry along one edge until the jamb liner pops out of the pocket.
2. Install the new jamb liner by setting one edge into the jamb stop and squeeze the liner together to set the flanges in place.
3. You DO, have to replace the tilt pins that match the balance ends in our kits. New tilt pins are included along with instructions in the box.
4. I’m assuming you already had the sashes out but…Let’s go back to the beginning. Vinyl “compression” means the sashes are held in by the liners putting pressure on the sides of the sashes to hold them in. To “tilt-in” your sashes:
- Open the sash to about halfway.
- Push out on the jamb liners, away from the edge of the sash and gently pull toward you.
- Holding the sash in a horizontal position by the sides, lift one side at an angle in the opening enough to clear the tilt pin from the balance. You should be able to lift the sash free from the opposite side and remove the sash now.
- Reverse to put the sash back in. Holding the sash at an angle to the opening, seat the lower tilt pin in first. Push down on the opposite side until both sides are even making the sash level in the opening again.
- Tilt the sash back up. While applying pressure to the jamb liners, push the sash back into the tracks. You should be able to raise and lower the sash with the tilt pins engaged with the balances.
5. One more tip. You don’t want to caulk any part of the jamb liners to the window frame. It sounds like a good idea to keep water out, but the jamb liner has to be able to expand and contract to operate properly. Caulking will basically lock it in place and not allow it to seal to the sash. Oh, and DON’T paint them!
Hope that helps! Order your jamb liner replacement kit today online at www.fensterUSA.com


I am trying to refurbish a pair of 1990’s era double-hung, single-pane, 6 over 6 wood windows. They have some kind of vinyl jamb liner and I don’t think that they tilt. I can repair the sashes, but I don’t know how to fix the jamb liners. The plow is neither square nor v-shaped, but rather semi-circular. The windows may have been locally manufactured (in eastern Massachusetts), but I assume the jamb-liner was not made locally. Does this sound like anything that you have heard of before? Do you think that you might be able to supply a replacement jamb liner that would work? I am not near the house right now, so I don’t have and exact measurement, but each window is around 32″ wide by about 62″ tall.
Kelly, Unfortunately this doesn’t sound like anything we can help with.
do you have a liner that works with sashes for early 1900s? old weight and pulley system
Craig, Unfortunately the liners we stock will not work for your application.
We recently purchased a house built in 1867 that has all old single hung wood windows. They have no jamb liners but I would like to put some in to help with weather proofing. Do you sell liners that might work? Only the bottom portion of the window opens and they all have aluminum storm windows. I also live in Canada but can’t find anything here. Thank you
In Stalled in 1971 wood double hung pella window vinyl lined cased spring loaded behind liner 771/2 at longest point an 77 at lowest so we have 1/2 rise at seal 31/4 on inside of lip 31/2 outside including lip that holds liner in place the tilt bar rides in the track I’m guessing the plow groove the tilt pin is fastend with a screw in the center of window frame that slides up and down the plow grove allowing the window to tilt The liner has a square groove with a rounded top The flat space between the 2 tracks 3/4 of an inch these liners were painted yrs ago you can only imagine that nightmare… spring loaded pully system behind the liner pretty cool thinkin id have to say gonna need a bunch can you handle this there are a few shorter I may need a few other parts as well and I need them yesterday….ty
James, Unfortunately our jambliners won’t work with a Pella product. Pella is infamous of manufacturing their own proprietary components that don’t interchange with anything else. You’ll have to go straight to Pella for this one, or unfortunately, replace the windows.
My sashes are 1 1/4 inches thick.Will your products work?
Don, As long as you have tilt-in wood windows with a standard “Vee” or “Square” plow, yes, our kit should work.
How can I purchase vinyl jamb liners for 1″ thickness square edge sashes?
Dan, Sorry, we don’t have anything for that thin of a sash.
My name is john, from philly pa area looking to replace balance springs on double hung, sash windows by caradco. Jam liners are in good shape and all springs are attached at the to of the liner as well as to the window. However, windows drop when unlatched. Thinking I need new springs, but not sure.
John, Our balance kits will work on your Caradco windows, but it sounds like you may have a simple fix. Usually, sashes fall because they are not engaged with the balance. You need to re-seat the sash pins in the terminals. If the terminals are broken, missing, or not connected to the spring balance, then you will have to replace the jambliners.
Hi Ryan and guys,
We have V shaped tracks exactly like you have on the picture. Where can we buy one like that? It is 1-1/4 inch sash. We are hunting for it for quite some time already…
Thank you!
Olga.
Olga, we have those for sale on our website, https://fenstersusa.com.
Thank you so much, Ryan. I can’t find any V-shaped for single hung windows on your website. Can you give me the link? Thank you.
Oh, You didn’t mention single hung. I’m sorry, ours will not work in your case.
Hello, I am seeking 54” long beige color “V” shape plow jamb liners and weight balance kits for double-hung sash of 1-3/4″ depth. The top and bottom sash each weigh 20 lbs. Do your jamb liners accommodate sash of that depth?
Bill, if the thickness of the sash stile itself (not the meeting rail) is 1-3/4″ then no. Ours work for 1-1/4 or 1-3/8 sash.
Hey there, I’m looking to replace a roughly 38″ bathroom window sash. The window are 1960s double hung with a square plow. I think its a 1 3/8″ sash measuring from the plow to the edge of the sash on each end. The old alumuminum sashes were made by Monarch Metalane. There was also a spring channel balance on each side – the channel balance immediately came apart when I took the window out, so I’m not sure how long it has to be. Please help!
Nick, Thanks for the interest, but that’s probably a bit too old for us. Our stuff only goes back to the late 70’s or so.
Thanks Ryan, is there a way I can remedy this situation by scraping together a couple parts, like a channel sash replacement, and pop-in a spring balance as long as it is the same size?
Possibly. There’s several window hardware companies online. Issue with the age of the windows will be finding available parts.
Do these jamba work wit Malta double hung windows?
Yes they do.
I need 4 5’2″ jambs for my Malta windows and 1 6’2″ jamb. Are these all $99? How much is shipping? I can’t find this info. thanks!
Donna, That’s no problem. You just need to fill out the order form and we’ll get you taken care of.
I have a double hung window with broken vinyl jam liners, 45″ tall and 31/8″ wide , can you tell me if you have something I can use to replace those liners?
Sorry Edwin, those measurements don’t seem to match what we have.
I need to order a jambliner could someone contact me please?
Chris those folks don’t have access to our blog, but here is the web address: http://www.windowpartsusa.com
I need 7 sets of jamb liners for double hung wood windows. I dont know the manufacturer name. They were made in the 80s i believe. Liner lenth is 54 inches to the long side. Beige in color square plows. Do these liners come complete with balances and guides? If ao i need a price to quote for a customer. Thanks
David,
Yes, we have what you need. All of that information along with the pricing is on our hardware website, http://www.windowpartsusa.com.
Hi
I just want to make sure I understand everything I know about this…2003 MW windows..wood double hung 15/8″ thick… dimensions 30 9/16″ w ( smallest dimension of three, top middle bottom) x 32″… top sash same width 31″ high.Length of jamb liner to longest edge 63″ (standard length 64″). Square Plow Low E Glass ….3/4″flat mullion..You can make this and ship it to me in North Carolina?
Thanks
We cannot Mike. We don’t offer brand specific, matching double hung sashes.
I have v-shaped vinyl jamb-liners, installed about 30 years ago. They are held in place by a combination of screws, top and bottom, through the center of the jamb, and also with retainer clips. Is there any tool available to disengage the jamb-liner from the retainer clip without having to remove the stop moulding? I can, if need be, remove the interior stop moulding but removing the outside casing and stop is impractical. If I need to cut the clips, do you sell replacement clips, or are they simply overkill? Thanks.
Tim, We’re not really on the hardware side of things. Something like this is way too specific for us.
Hi… we have new Jeldwen windows… On the sash replacements we decided that we wanted them to be full replacement after they arrived. Jeldwen said no problem and we paid 2,500 for 7 new jambliners. That was in August and now our windows still don’t match up correctly Jeldwen says there is an industry standard filler that will make the sash replacements fit into the”new construction” jamb liners. They claim this is an industry standard. Have you ever hear of such a thing? It has been months and we have never seen the “industry standard” fix that they are promising. Thank you in advance
The Fenster Jambliner included in the Fenster Double Hung Sash Kit has a flange mount that differs from my original Malta Double Hung windows (circa 1992). In the video at 3mins, 26secs, Ryan Schwartz explains that “we (Fenster) are only stocking a flange mount replacement kit … that has a lip that fits into grooves on your window”.
My Malta window frame has two metal clips behind the original Jambliner to hold it in place (i.e.: no grooves). I removed the metal clips and initially installed the Fenster Jambliners, but they bowed, putting too much pressure on the window sash when installed, making for difficult window operation. I removed the Fenster Jambliners and cut grooves into my existing Malta jambliner stops, then re-installed the Fenster Jambliners, which now snapped in much better. Now my new Fenster Double Hung sashes are installed, look great, and have smooth operation. One down, nine to go.
This retrofit took some time, but worked great. The other option was to order Jambliners designed for the original Malta window with metal clips.
Thank you very much for your comments Paul. This is exactly the kind of feedback we need more of. You are exactly correct. We stock the “flange mount” style of jambliner that was most common in new construction windows. However, our liners are designed to be interchangeable with your style of window known as a “bracket mount”. You took exactly the correct steps to modify our stock liner to work with your brackets by razor knifing off the flanges. Otherwise, the liners should be very close dimensionally. Unfortunately it is a bit more work, but should still achieve the same result. While we don’t offer the option on our websites, customers can notify a sales rep that they have bracket mount liners. We will not remove the flanges in the factory, but we can provide new brackets if requested. Thanks again!
If i give you the exact measurement(length to long and short points), will you cut the compression jamb down to the required length.
Larry, I’m sorry we won’t. Those are cut to length in a jig. You can cut them to any length you wish. However, A word of caution, We sell liners to industry standard factory rough opening sizes. They have never worked for every customer, I mean EVERY customer who has tried to cut them to a different size. This is an issue of either, a mis-understanding of where to measure from, or the customer is trying to use our liners for a different application for which they were intended.